|
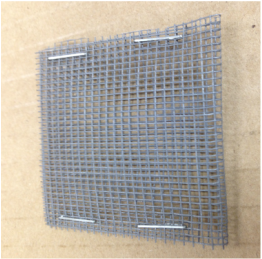
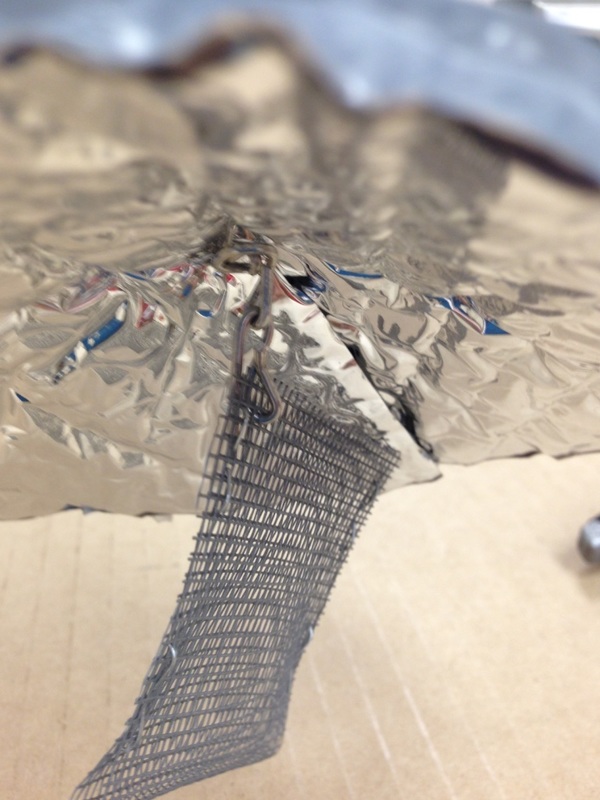
Update: After several data tests, we ran into an issue with sunlight hitting the ibuttons when the sun was low in the sky. The new and improved version includes a side shield from the same reflective material. 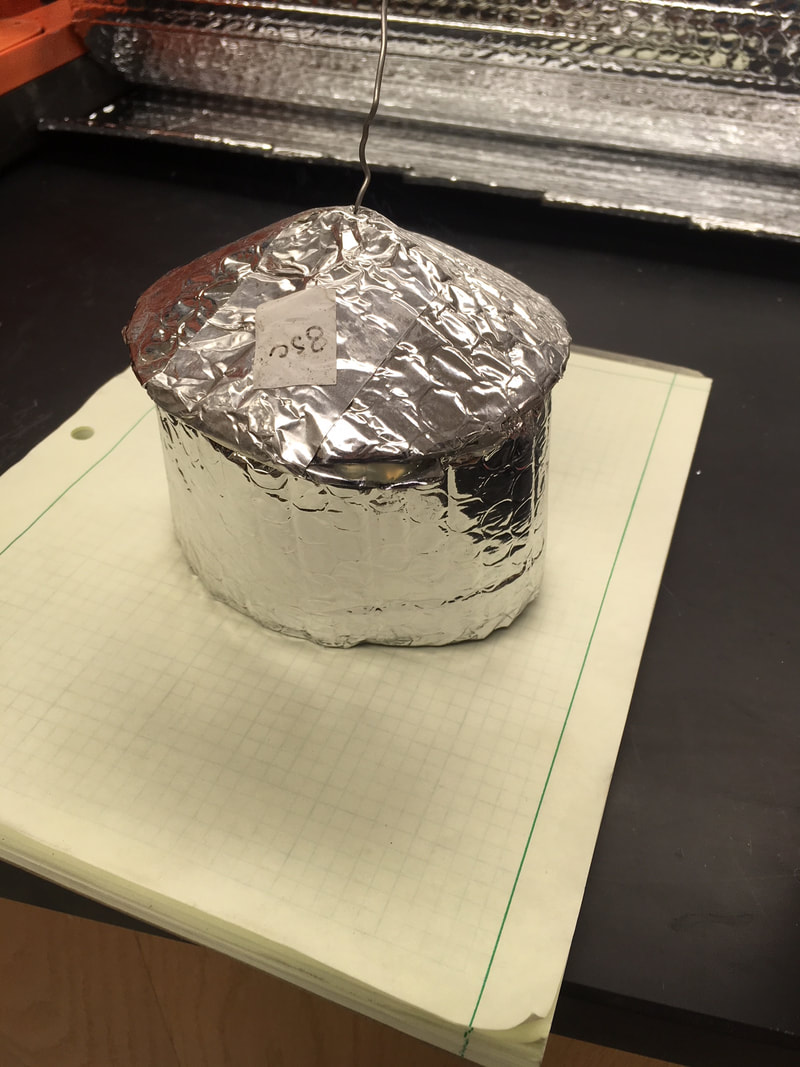 Original Post: There is a great paper by Julie Tarara and Gwen-Alyn Hoheisel where they manufactured several different radiation shields for temperature data loggers and compared the effectiveness of the designs in regulating temperature. We are starting a project where we plan to deploy some iButton sensors to measure temperature and relative humidity around some seedlings. After taking a look at their various designs and considering our needs, I spent some time wandering around one of those gigantic home improvement stores in an effort to determine how best to construct single cone radiation shields for our sensors. Below I provide a materials list and step-by-step instructions for constructing a shield so you don’t have to spend four hours on a Saturday trying to cobble one together (slight exaggeration, I lost 2 hours to aimless wandering in the home improvement store). The total cost per radiation shield is somewhere south of $0.60 (excluding labor costs) and roughly 1/3 of that cost is tied up in the metal stand to elevate it off the ground at the proper height. If you find yourself building a radiation shield and come up with an improvement, please let me know so we can try it out. Note: This post is not an endorsement for any of the brands listed. Where I note brands, it is simply in an effort make it clear the materials used. Whoever said ecology is nothing but PVC pipe and duct tape? Well, they were wrong. Turns out if you want to build some radiation shields, you’ll need the following: Materials: Silver gray fiberglass insect screen (I purchased a 36”x48” roll for $6.78) Foil tape ($3.35) Reflective insulation (Reflectix 24”x10’ for $10.85) 17 gauge aluminum wire (electric fence wire $4.67) No3 rod chair 3”x10/16” (you’ll find this with the rebar $0.58 each) Stapler Hot glue Methods: 1. Cut a piece of screen that is 9x5 cm (or 5x9 cm, just depends on how you like to measure), fold it in half and staple the edges. Make sure your staples are a couple of rows in from the edge so the screen does not come apart.
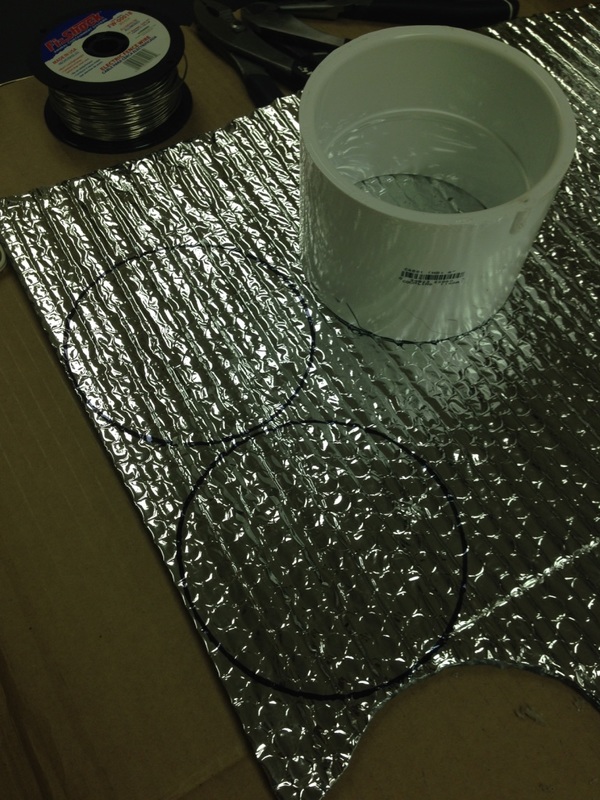
2. Cut a 3.5cm piece of wire and fold it into an S hook. Thread the S hook through the corner of the screen bag you made in step 1. Keep in mind, that you can buy little S hooks, but what kind of an ecologist would you be if you just bought something off the shelf when you can spend an exorbitant amount of time making one for a fraction of a penny less? 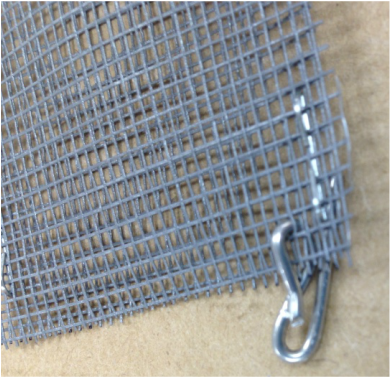 3. Cut a circle from the reflective insulation. I used a 4” diameter PVC coupling as a template. For this step I recommend using all of those pennies you saved making your own S hooks and investing in a nice heavy-duty pair of shears for $12-15.
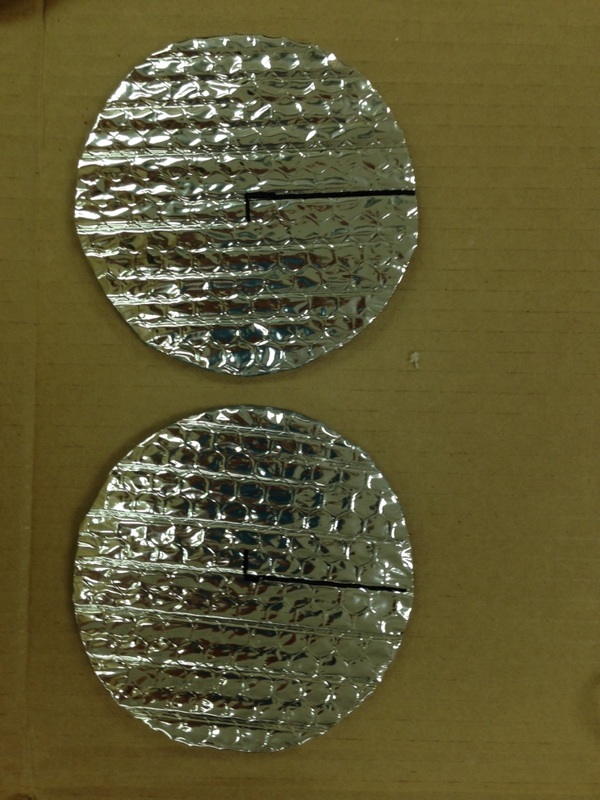
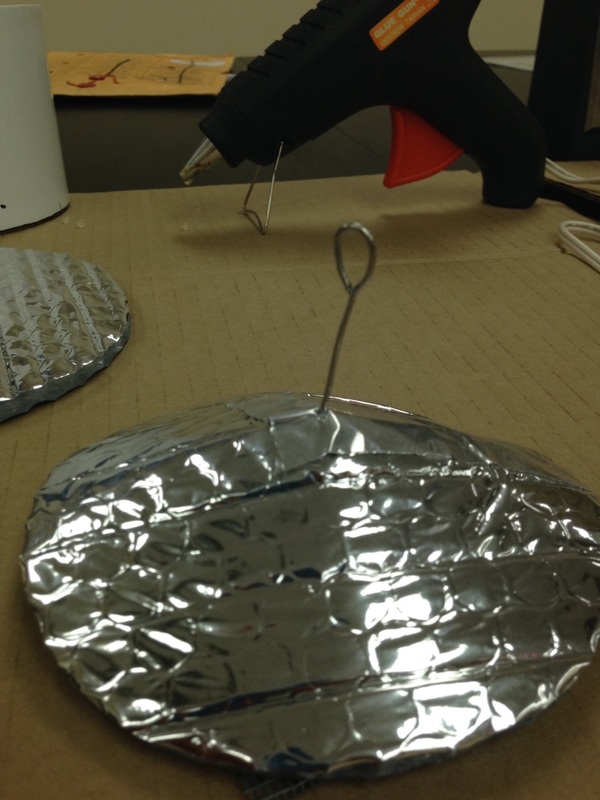
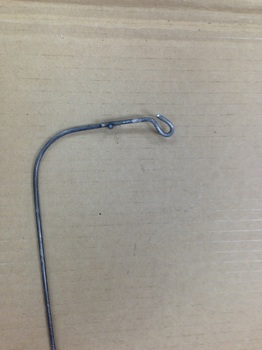
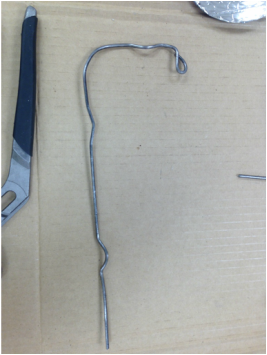
4. Mark the center of your circle and make a cut from the edge to the center. If you’re a little obsessive like I am, you’ll measure the exact center of each circle and then realize that once you’ve made the perfect cut you still get an imperfect cone. 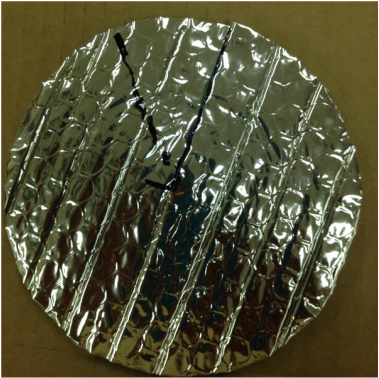 5. Overlap the cut edges by 4.5cm and use hot glue to adhere the pieces. Wooden clothespins are a good choice for holding the seam together while it dries. It turns out that it takes hot glue exactly the same amount of time to dry that it does for the hot glue to give you a first degree burn on your fingers while you’re holding the seam together. (In case a representative from OSHA reads this, I didn't really get first degree burns. I just used artistic license to try and keep this entertaining.) 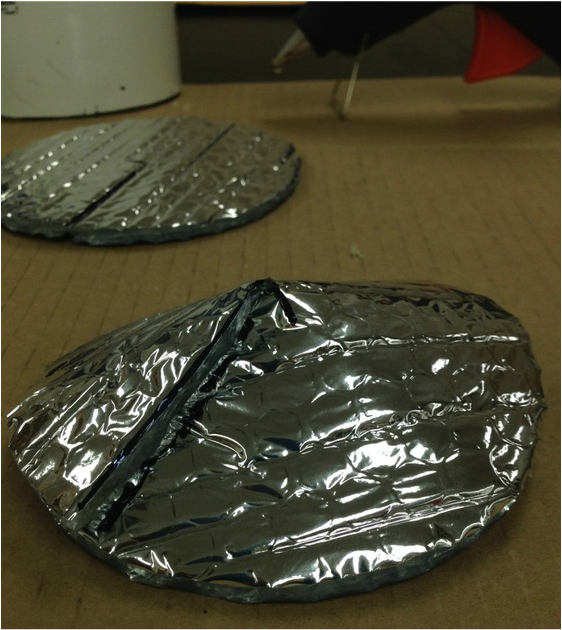 6. Use an 8cm piece of foil tape to cover the seam and the point of the cone you just created in step 5. I don’t recommend cutting your fingernails right before you do this or it will take you far longer than it should to get the backing off of the tape! In fact, this made me wonder if all HVAC professionals maintain a longer nail on one finger to aid in separating the backing from the tape. FYI: stopping to wonder during this process will prolong the time required to complete fabrication.  7. Cut an 11cm piece of wire and at 4 cm from one end fashion a loop that is perpendicular to the direction of the wire. This will serve as a stop for your cone. 8. Below the loop, fashion a hook to attach the S hook you created for the screen bag.  9. Pass the wire through the cone at the point, piercing the foil tape. Probably an unnecessary step for me to write. If you’re building your own radiation shield, you probably could have figured this one out. 10. Fashion another loop above the cone to attach to the stand.
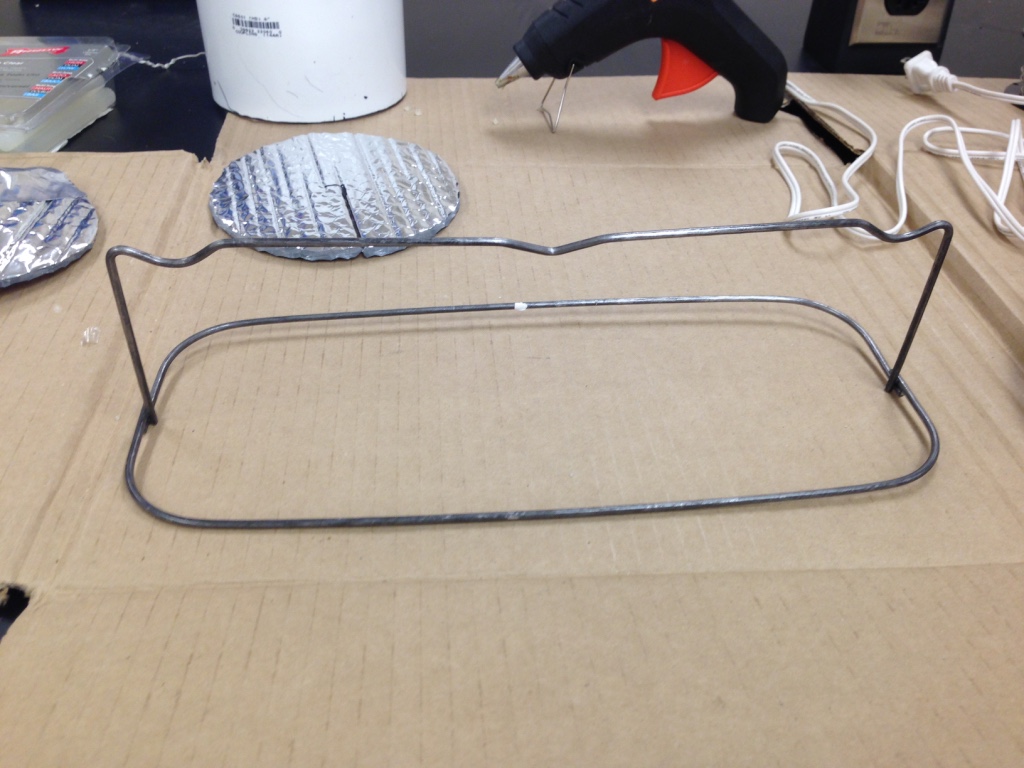
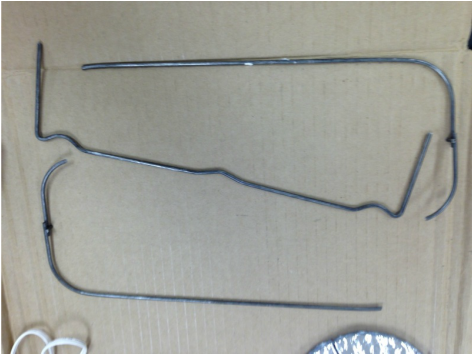
11. Cut the No3 rod chair into three pieces at locations that use the bends to your advantage. In case you’re wondering why they call it a rod chair, it’s because they set on the ground and support rebar for reinforcing concrete. You’ll find these in the concrete section of your home improvement store. When you enter the home improvement store, start at the far end where the garden section is and wander aimlessly up and down every aisle. When you get nearly to the other end of the store, you’ll find the concrete supplies. And now you’re asking yourself why did this guy start in the garden section if he knew concrete supplies were on the other side of the store? I can’t help but wander through these stores because I might find something I just can’t live without.
12. Use two pair of pliers to bend a loop in the short end of the rod chair piece. You’ll want to use two pair of pliers because the weld will not take the torque required to make the bend with only one pair. I used a pair of regular pliers, a pair of needle nose pliers, and a pair of channel locks to make the bends. If you must know, I found those three pair of pliers and a pair of wire cutters in a four pack for $15 while wandering the aisles between the garden section and the concrete supplies. See, it can pay off to wander.
13. Attach your cone and bag to the rod chair stand and voila, you’ve manufactured your very own radiation shield for an iButton. With a little cardboard from the recycle bin and some hot glue, you can even make your very own decorative display stand.  I have affectionately named these space mushrooms (TM). You'll see once you put them out in the field. 14. Repeat steps 1-13 because you know that n=1=worthless; because you have to hedge your bets against demonic intrusion (sensu Hurlbert 1984).
2 Comments
Marlee
9/28/2018 10:25:09 am
Thanks for sharing these instructions! I am looking forward to trying out this design for my own seedling study - I was just wondering how easy it is to get the i-buttons out for data collection? Also, have you compared the effectiveness of the reflective insulation to any other materials, like styrafoam (I personally think the insulation sounds like a good material, but other people keep telling me to use styrafoam so I thought I'd ask). The i-buttons I have inherited from a past student actually have little plastic holders like a keychain with a hole in one side for hanging them - do you see any reason why hanging these underneath the radiation shield you designed would be problematic - if not, it would save me a lot of time (I will be making quite a few of these!) Thanks!
Matt
9/28/2018 04:29:30 pm
Thanks Marlee, I'm happy to hear the info was helpful. If the wire you use to hold the mesh bag is long enough, it is pretty easy to slip them out. I did not try other types of insulation. However, one of my students did run a test with different PVC contraptions before coming up with the updated modification. He also compared these to our weather station measurements to ensure we were getting accurate values. If ours had plastic hangers, I definitely would have used those instead of making the mesh bags. As long as the ibutton doesn't hang below the side-curtains of the radiation shield, you should get good measurements. Good luck with your project. Your comment will be posted after it is approved.
Leave a Reply. |
Archives
October 2023
Categories
All
|
 RSS Feed